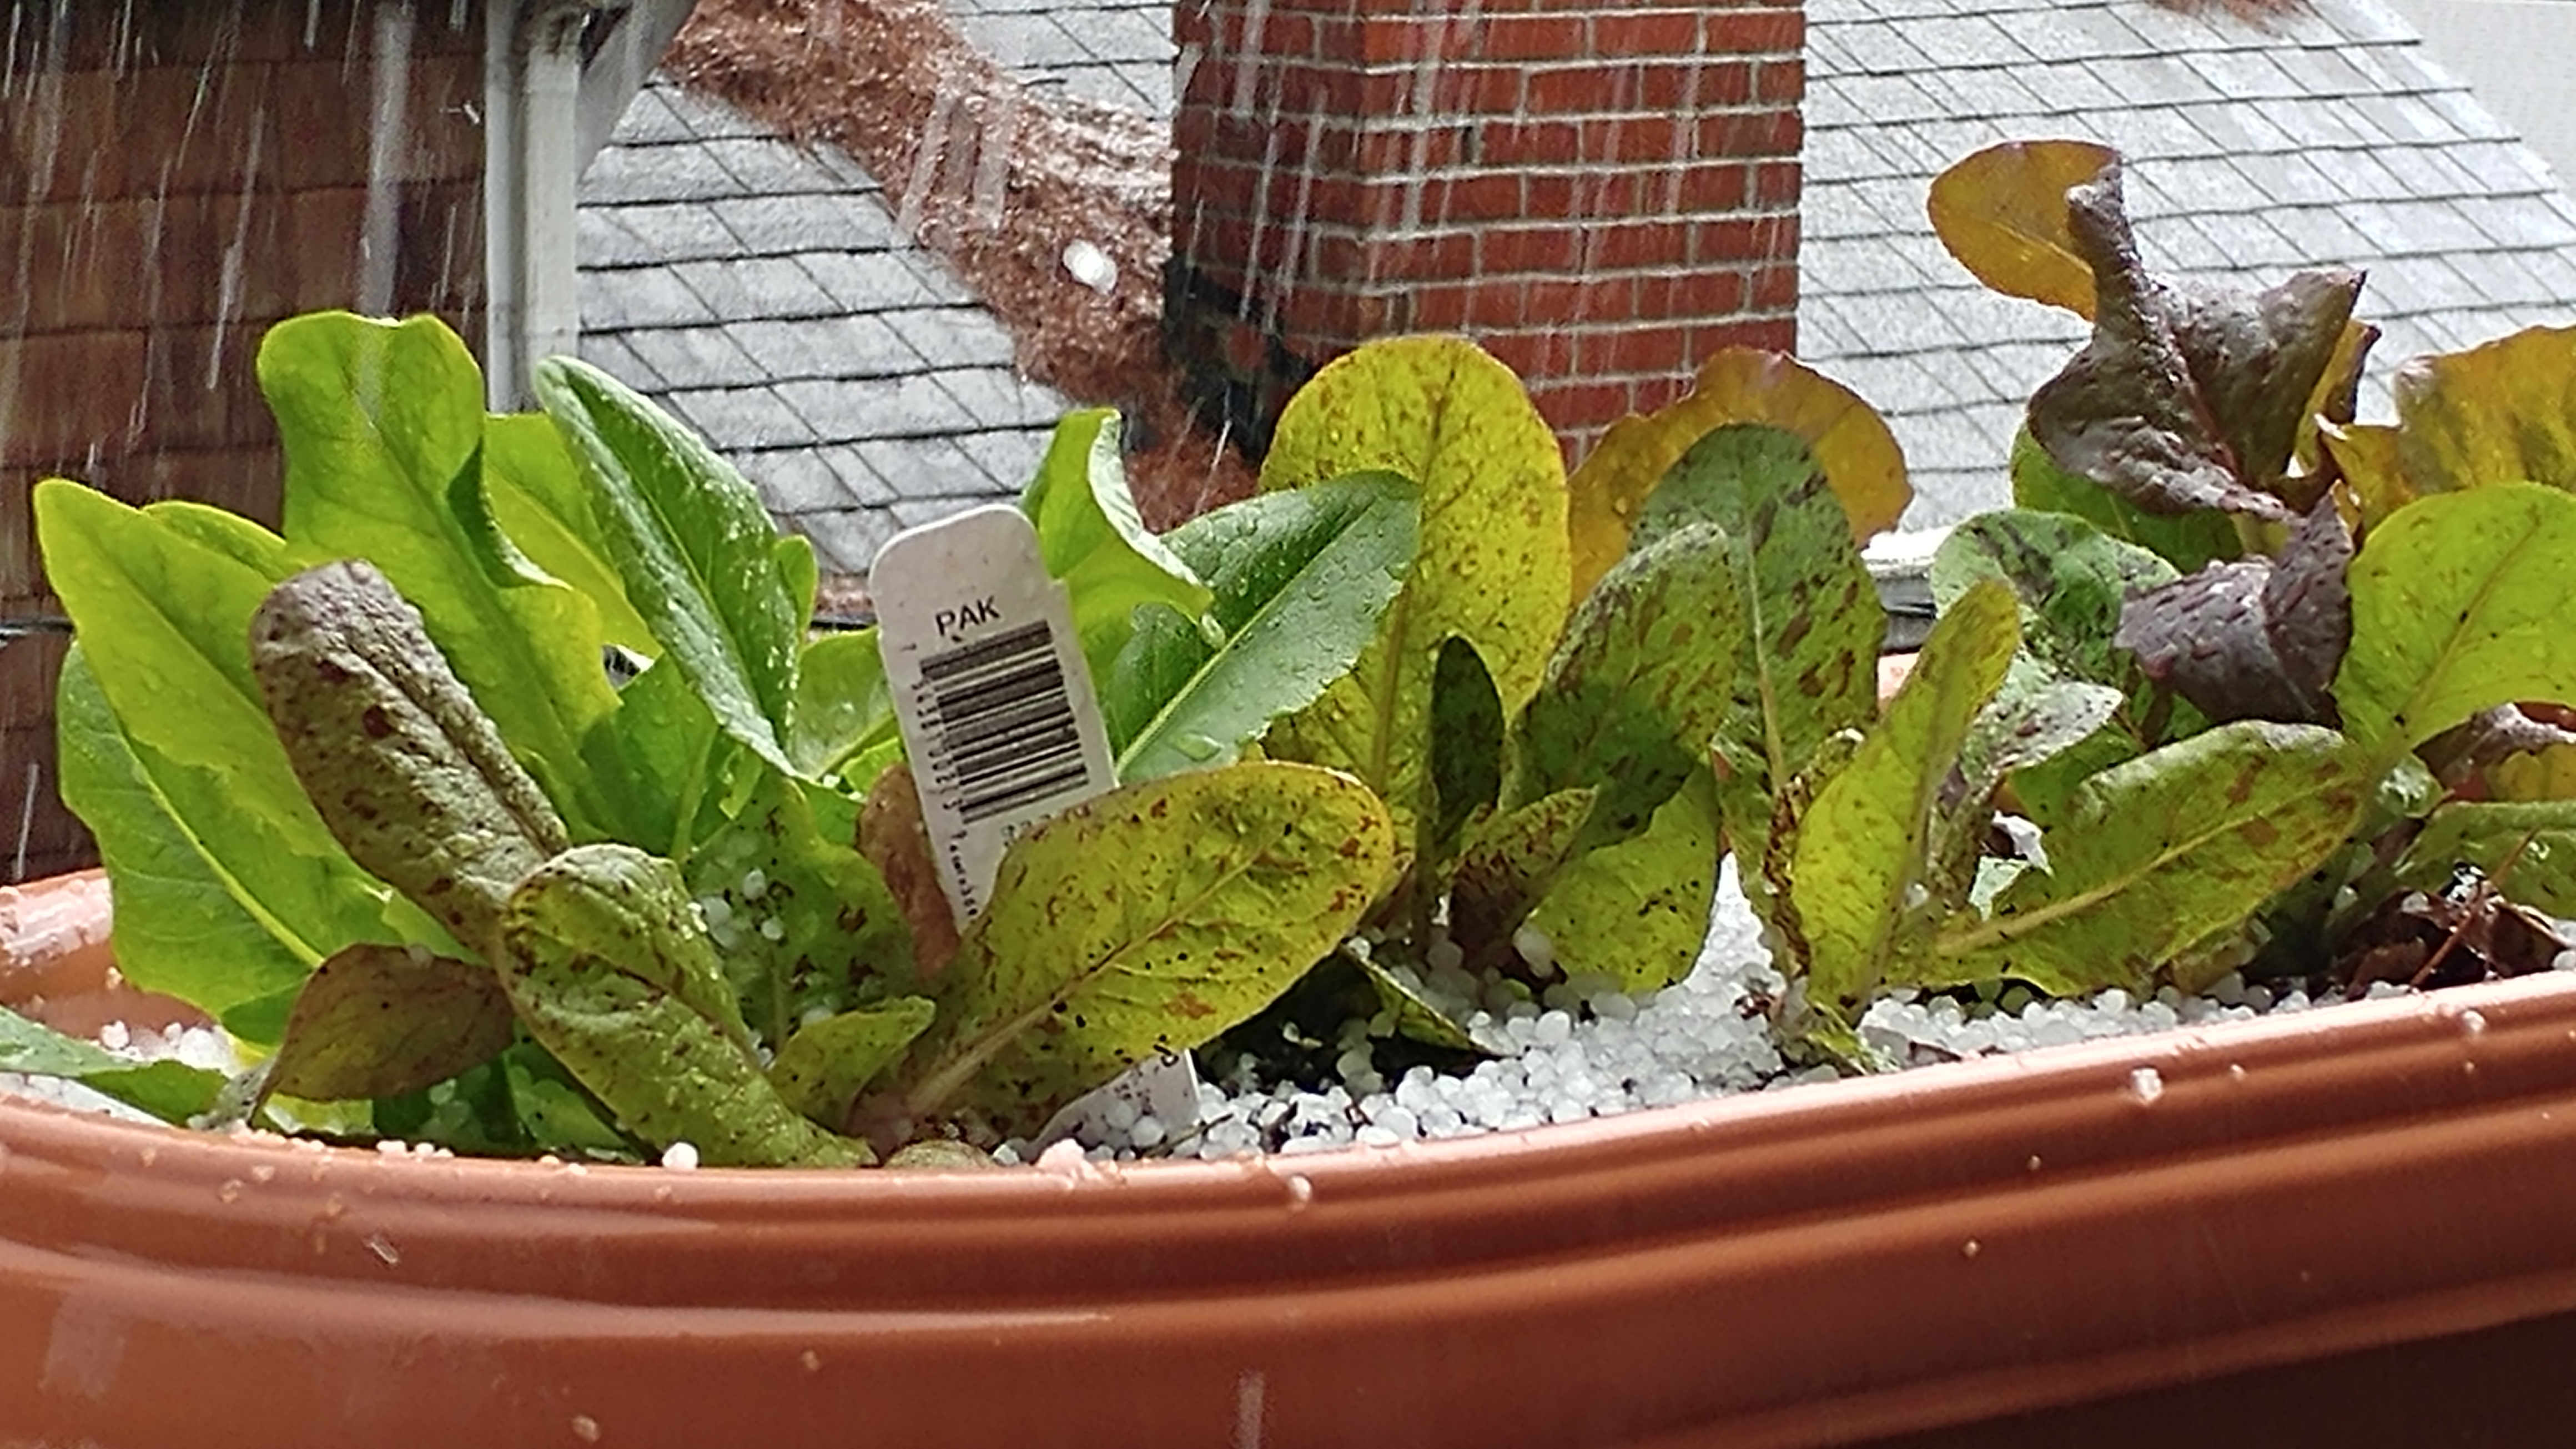
 The past month hasn’t seen much activity in the garden. April, true to its history has been wet, wet, wet. A surprise hail storm lasted long enough to see a rather large pile of hail exit the roof and establish itself in front of our porch. Its remnants were still there the next morning when I left for work. Fortunately, the hail was small and didn’t seem to do any damage either to the balcony lettuce or to the spinach seedlings just coming up at the community garden spot. I’m sure the lettuce was wondering what was going on.
This Just In
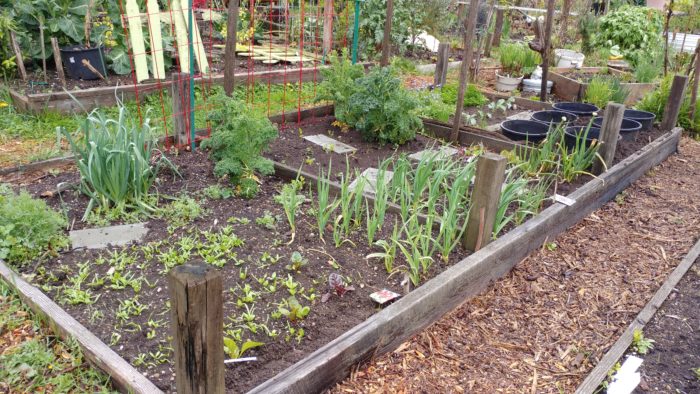
Today saw the planting of two varieties of potato, Makah Ozette and Nicola. The latter is a European variety of a lower glycemic potato. I’ve only found ONCE source in the US so far, the Main Potato Lady. Once again I opted for planting in half buried large nursery pots, 6 in all. I learned about this method from a community gardener in the UK. Also into the ground went some beet (Cylindrical) and radish (French Breakfast) seed. Yeah its wet but there wasn’t a lot of disturbing the soil except where the potato pots were ‘planted’. I think they are happy.
Whats Growing
Broccoli and Chard:
4 starts of each went in the ground near the end of last month. I wasn’t planning on planting chard but they are so pretty and I was so needing to plant SOMETHING.
Garlic:
Last years two garlic plantings are coming along nicely. Looks like I have near 100% of what I planted up and ready to start the season. I gave them a bit of fertilizer last month and with all this rain they should be getting the full benefit. Bring on the sun.
Kale:
Another overwintered crop. I planted these from starts late last summer. We’ve been eating on them for about a month now. They have started to go to seed but the dog will eat the unopened flower tops so life is good.
Leeks:
The last of the overwintering trio. A fellow gardener offered up some tiny leek starts last spring. They ended up getting overshadowed last summer and stayed pretty small. They come back with a vengeance this year and are almost ready to harvest.
Lettuce:
The old lettuce seed I planted last month did nothing. Not surprising. I think the seed was circa 2014. I picked up some starts from a local garden center and tucked a few starts of the old Amish variety in next to the onions and a few other from a mixed lot into the balcony planter.  I decided to bite the bullet and buy some fresh seed and start those in a plastic container inside. They are about half ana inch tall now and will be tucked out here and there once things get more settled.
Peas:
My nearly vegetarian dog LOVES snow peas. We do too but she ends up eating most of them. I planted half as much as I did last year, a single cardboard trough worth. The idea was to get them up indoors, grow them out on the balcony to about six inches then plant out. The scheduled roof redo meant they went into the garden early. So far so good.
Spinach:
The two varieties of spinach are coming along nicely. Spinach bolts when the days get to be a certain length so the season tends to be short here as we get long pretty early. Its a pity, the climate could make for some awesome spinach almost year round.