Obtaining your starter
These examples used Carl’s 1847 Oregon Trail Sourdough Starter that I received from Carl in 1999. Your results may or may not be the same using another sourdough starter. If you are nearby and would like to try some of this starter let me know and its yours. I don’t ship it so if you aren’t local you can stop by the Carl Griffith’s Sourdough Page if you would like a batch of the dried starter to try for your self or if you just want to learn more about this heirloom sourdough starter. You can also stop by http://www.sourdo.com/ where they sell starters from all over the world.
It is also possible to capture your own local starter by combining flour and water into a thinish dough/batter. Place it where it will be exposed to air but not in direct sunlight. Leave uncovered and stir vigorously to incorporate air into the mixture. Stir a couple of times a day and in a few days you should start to see bubbles. Different areas of the world produce starters with different qualities. This will be easier to do during warmer weather but should work in the winter with patience.
It is possible to dry starter and keep it in the freezer for later use. This is especially nice if you don’t bake very much or want a backup of your yeasties.
Note the longevity, speed of activation, dehydration and storage capabilities vary with the type of starter you are using, how much of it you start with, and the environmental conditions. In other words, your mileage may vary.
Reactivation of Dried Starter
Starter that has been dried may be reactivated using the following instructions.
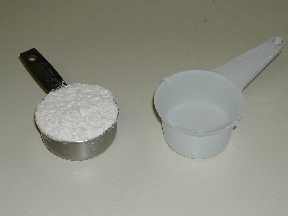
1. Place a teaspoon or two of the dried starter in a glass or plastic container. I use a wide mouth quart canning jar. As the yeast develop the starter will rise a little so don’t start out with too small of a container. I find that a qt container works nicely.
2. Measure out about 1/3 cup of water and 1/4 cup or more of flour, the exact amounts are not critical just aim for something a little thicker than pancake batter. A note about the flour and water: Bread flour works best but All Purpose may be used. DO NOT use self rising flour. I use filtered water that has the chlorine removed. If you don’t have filtered water you can either let the water sit out a day or so, buy bottled water or try tap water. Remember this starter is a colony of living organisms and what we feed them does matter.
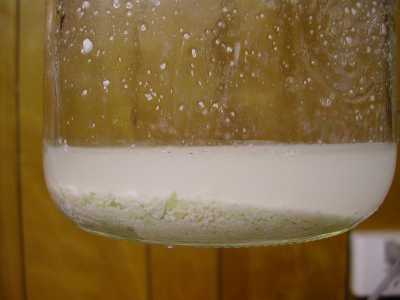
5. Cover with a paper towel and use either the canning jar ring or a rubber band to secure the paper towel. Place this jar in a warmish place. Take care that the starter doesn’t get too warm. It is better to be too cool than too warm. I keep mine on the counter next to the fridge.

6. After 12 hours (depending on the species of starter and temperature, maybe sooner, maybe later) you may begin to see bubles appearing. Look inside the jar and around the outside. The bubbles mean that the starter is waking up. Stir the starter to incorporate in more oxygen. Replace the paper towel.

Care and Feeding
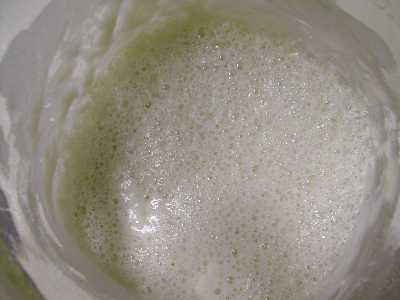
7. After 24 hours more bubbles should appear and it may start to have that sour/alcohol smell. This is good. It is also time to feed it. Add another round of flour and water. The exact amount isn’t critical but you want the starter to be a bit thicker than pancake batter but much thinner than biscuit dough. Stir well, cover with the paper towel and put back in it’s warm place.

Maintaining your starter
This starter should be fed every 24 hours while it lives on your cabinet. To feed your starter add flour and water as in #7 above. Some people add sugar, milk, potato water etc. when they feed. I never have. I have only fed with water and bread flour and have never had a problem. If you find that the starter stops bubbling and starts to go dromant before the next feeding consider increasing the amount of the feeding. It is probably not enough for the amount of starter you have.
At some point your jar will become full. When that happens you can give the extra away, dry it, or as a last resort, pour all but about 1/4 cup down the sink. If I am baking a lot I like to keep two jars going in the fridge in addition to my dried backup. I had a jar break on me once and another time a batch become contaminated with soap by a well meaning dishwasher.
If you need to go on vacation or just want a break see ‘Storing your Starter’ below.
Storing your Starter
If you don’t anticipate using it for a couple of weeks you can let it go dormant in the fridge. After a normal feeding place the jar on your counter as per usual for an hour or so. Then replace the paper towel with a piece of plastic wrap or sandwich bag and place the starter in the bottom of the fridge and leave it alone.
The plastic is to keep the starter from spilling but allow room for expansion. The living process will continue in the fridge, just at a slower rate. Some people feed it every two weeks or so while it is in the fridge. I never have. I tend to go through cycles of heavy use and no use. During the no use times it probably averages a feeding once every 3 months or so but has gone as long as 6 months between feedings. I wouldn’t advise going that long between feedings on a regular basis.

I generally bake in spurts. I may bake several times a week for a month or so then not again for 6 months. For this reason I have started relying on the dried starter I keep in the freezer rather than trying to keep a jar going in the fridge. If you bake with it more often then going the fridge route will work fine.
Drying Instructions:
When your starter is active (bubbly) it is ready for use or drying. To dry give it one more feeding, stir well and let sit till the bubbles start to appear (see #6 above). Pour some starter out about 1/8″ to 1/4″ thick onto plastic sheets, plastic plates etc and let dry. This may take several days or even a week depending the temperature, humidity and thickness of the starter. I have thinned mine with a little water prior to pouring . It can actually speed up the process. When the top gets good and dry I peel of the sheet of starter and turn it over to expose the bottom to hasten drying.
Once the starter is very dry I put it in the blender and add an equal or slightly lesser amount of flour. This is blended for a short time. Blending too long will heat it up too much. Not good. Usually I blend till the pieces are small, about the size of rice or wheat grains. This is put in a tightly sealed jar and stored in the freezer. I have kept my dried s.d. starter in the freezer several years and it has activated nicely but my guess is it will survive much longer if kept frozen and completely dry.
This dry culture can be handed out to friends or kept as a backup. When I reactivate it I generally use no more than a couple of teaspoons to about a tablespoon of the dried stuff.
Using Your Starter
Books and recipes for sourdough goodies abound. A quick google search will give you more than you want. I have a couple I use regularly…
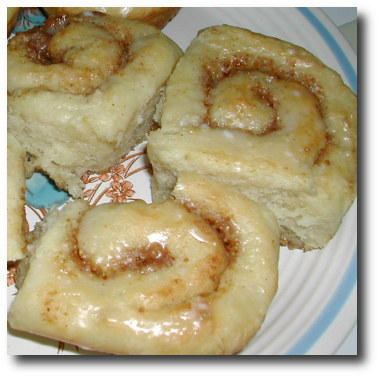
Cinnamon-Orange Sourdough Rolls
The night before baking:
Combine 1/2 to 3/4 cups starter
1 cup bread flour
1/2 cup milk or buttermilk
Stir well and cover loosely.
Early the next morning:
Stir 4Tbs cooled melted butter into the sourdough mixture you prepared the night before.
Add 1Tbs baking powder and 1 tsp salt to 1 cup of flour. Stir well and add to the mix.
Knead a few times adding a flour if necessary to form a ball of dough.
Pat out onto a floured board, shaping into a 1/4 to 1/2″ thick rectangle.
Brush with more melted butter and sprinkle a mix of 1 Tbs dried orange peel, 1/2 cup sugar and 2 tsp ground cinnamon (or pumpkin pie spice) over the butter.
Roll up starting with the long edge so that you get a log. It helps to pinch the edges together to keep the cinnamon mix inside. Use a sharp knife or string, cut into 3/4″ slices. Place in a greased baking sheet with sides barely touching.
Cover and let rise for a couple of hours. Bake in a preheated 350F oven for about 25 minutes or till lightly golden.
Turn out onto a rack, brush tops with more melted butter and drizzle with glaze (below). mmmm
Glaze
Combine 1 cup powdered sugar, 1/2 tsp vanilla and enough milk to make a runny glaze.
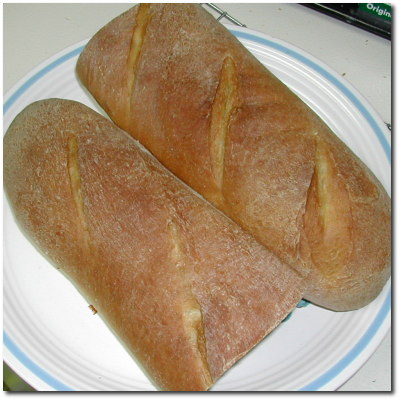
Sourdough Bread
Pre-rising (24-36 hours before you plan to bake):
Combine in large bowl
2/3 cup sourdough starter
2 1/3 cups flour
1 2/3 cup water
Mix well and lightly cover. Place in a warm (not hot) spot out of direct sunlight.
2nd Rising: (3-5 hours before baking).
Stir 3 Tbs oil into starter mix
Add 2/3 tsp baking soda, 1/4 cup sugar and 2 tsp salt to 2 cups of flour. Stir into starter mix.
Knead until the dough has a satiny sheen and pulls away from the bowl easily. I use my mixer with a dough hook and it usually takes about 5 minutes with the long (24-36 hour) pre-rising, more with a shorter pre-rising.
Shape into two or three loaves depending on the size of your pans, brush lightly with oil and let rise till double. The amount of time this takes depends on the starter you are using and the temperature of the dough. Warmer = faster to a point. When your dough has just about finished rising, using a sharp knife or straight edge razor, cut slits across the loaves to allow for expansion.
Bake at 375 for 30 minutes or till golden.
The long pre-rise time means that only ONE additional rise is needed after the dough is formed. It is possible to increase the sourness of the dough by starting with starter that has started to go dormant, starter with a little bit of rye flour added and/or rising in a cooler location thereby increasing the rise time.
This looks promising.. one question, is it possible to do this starter gluten free?
That would be a good option..
Kerry, I happened to come across your Blog and see that you are in Kentucky. I live in Louisville, am retired and grow Heirloom Tomatoes and Kentucky varieties are my passion!
I love everything I see here. I do not have a blog; I am not very techy and have difficulty just surfing the internet.
I look forward to hearing from you.
Gary Millwood
(address removed)
Blogs of my best of Gardening Friends —
Rare & delicious Kentucky heirloom tomato seeds
http://www.blueribbontomatoes.com
http://blueribbontomatoes.blogspot.com
Gladgrowing In Kentucky : )
http://gladgrower.blogspot.com/
Friend Terry’s Blog – She is addicted to Tomatoes
http://tomatoaddict.blogspot.com/
Gary,
Glad you liked the blog and thanks for the links. I removed your home address. Call me paranoid but I would never put my street address on the internet.
Do you have problem with blight on the heirlooms in L’ville? I had to give up the heirlooms here as they were always overcome with blight about half way through the season. Too much work for no tomatoes. 🙁
Hey there,
I have been playing around with sourdough for a very very short time. I started a starter maybe a month ago or so and made probably around 10 loaves of beautiful and tasty bread. Then I have not idea what happened, but it just wouldn’t double in bulk anymore and there just didn’t seem to be any activity. After trying various things, I gave up and threw it out. I have now started a second starter, this one is very liquidy, but very active. Yesterday I decided to try making a loaf and the texture seemed great, it doubled overnight and had a great smell. I separated the dough and waited for it to rise. I just checked on it a while ago and the two have merged into one blob. What do you suggest I do? Add more flour? Any suggestions would be greatly appreciated. Thanks, Sandra
First off, I am no sourdough expert. I have had cultures die on me and I have had locally captured yeast yield terrible tasting bread that rose beautifully. Perhaps the colony you had wasn’t a strong one? Did you trap the yeast, use packaged yeast to start it or buy a culture?
hey Kerry
newbie at sourdough, I have a starter that I have made with well water, bread flour and a pinch of brown sugar to guess I am truly intimidated by the sourdough process, I suppose I have made dozens of starters (or many more) over the years..and dumped them out due to the intimidation factor involved, the starter went great each time with a few booboos…before I gave up..so I would use the starter in place of the liquid in the recipes for bread??? how many times to let rise before placing in bread pan and baking??+ refresh the leftover starter?. do I have to have special pans for the french bread?? or can I just form them and place them on a baking sheet or stone?? what temp and time needed?
thanks in advance
sorry for the long post
merry christmas and happy new year
Sgt. b