 One of the great things about gardening is that most of us are always open to trying something new. How else can you see what works and what doesn’t if you don’t experiment? Of course what works and what doesn’t is a moving target depending on the year, variety or general mood of the cosmos. Today while working with Anita at the Rock Farm Community Garden she and I had a discussion on different ways to grow tomatoes. I shared with her the way we used to do it in Kentucky, the post and twine method also known as the ‘Florida Weave’. PnT involves driving posts between every second or third plant and criss crossing twine around the plants and posts at about 12″ intervals up the posts as the plants grow. I learned this method from a friend who grew tomatoes commercially. It uses very little in the way of equipment and time, a must for a farmer. My friend tobacco sticks which were about 6′ long and 1″ square. I used 6-7′ t-posts, more expensive but longer lasting AND I was in short supply of tobacco sticks. In PnT we never pruned or pinched the tomatoes. Anita shared a method she has found works well, tying the toms to netting stretched between posts. Anita says that she always pinches and prunes and that it has worked well for her here in the PNW. In hot and humid Kentucky, the leaves were retained in order to protect the fruit from the summer sun. I could see how in the cooler summers we have here the fruit might appreciate being able to ‘see’ the sun rather than be shaded under the leaves. Anita was open to trying the post and twine method with a couple of short rows. I’d be interested to see how pruning worked on one of those short rows of PnT.
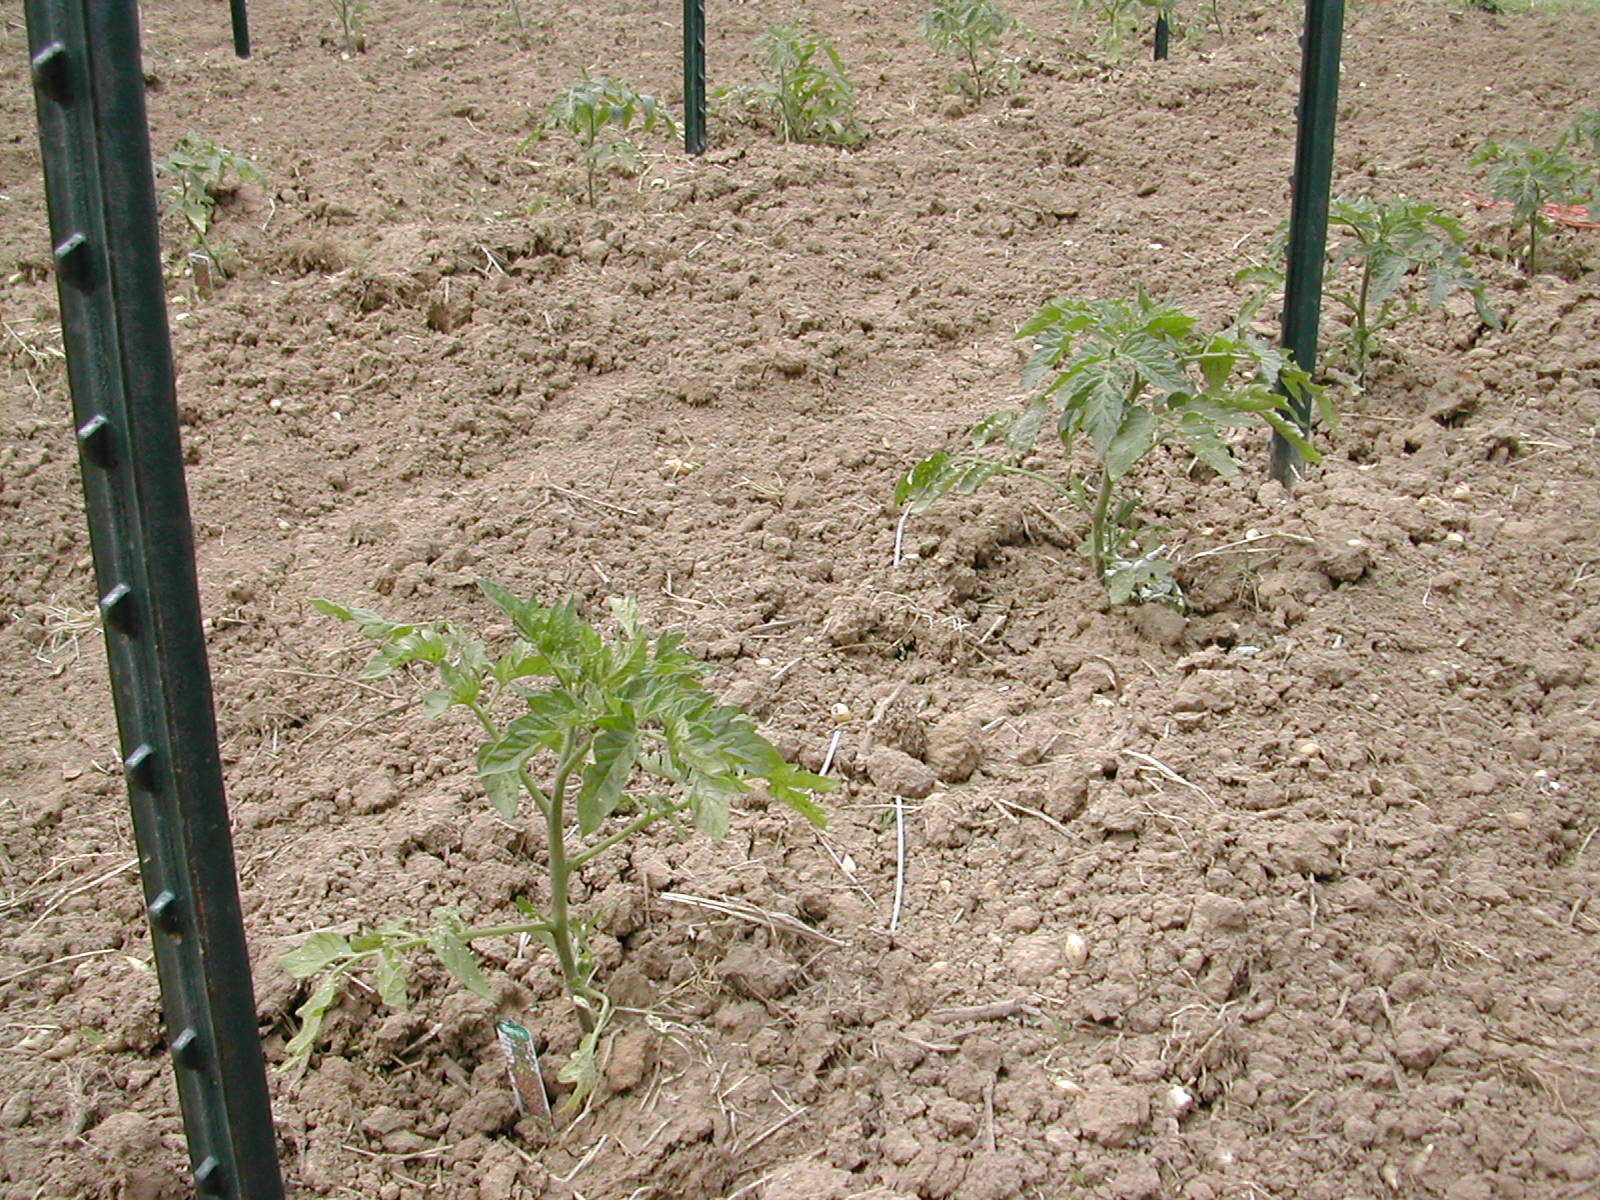
 I decided to dig out some old photos from my Kentucky garden describing this method. I had a fairly large garden in KY, about 40’x60′ so lots of space to play with. I spaced rows 5′ apart and plants 18″ apart. Depending on the variety I might put two or three plants between posts, three if they were determinate and two if they were indeterminate. I usually planted VERY deep, stripping off the lower leaves leaving only one or two leaves above ground. This encouraged the roots to grow down in the more moist soil which would help to protect them from the bone dry hot days of summer. I almost always mixed a couple tablespoons of Epsom salt and a 10-10-10 fertilizer with the soil that I dug out of the 8-10″ wide hole. After the plants grew another 6-12″ I would do the first tying. The twine, (think thin jute) was strung in a figure 8 fashion. Starting on one end of a row, the twine is tied to the first post, criss crossed around the two or three plants, (left side of first plant, right side of second etc) wrapped around each post down the line before coming back on the other side and meeting back at the first post. In the end the plants are surrounded by twine.
 Throughout the season the tying happened about once a foot or so. The first tying was always very narrow as there was only a small stem to encircle. As the plants grew and had multiple stems the twine would be tied tight enough to pull the plants up off the ground and loose enough to leave them enough space to grow. The occasional stem that would sneak out could be tucked in behind the twine as necessary.
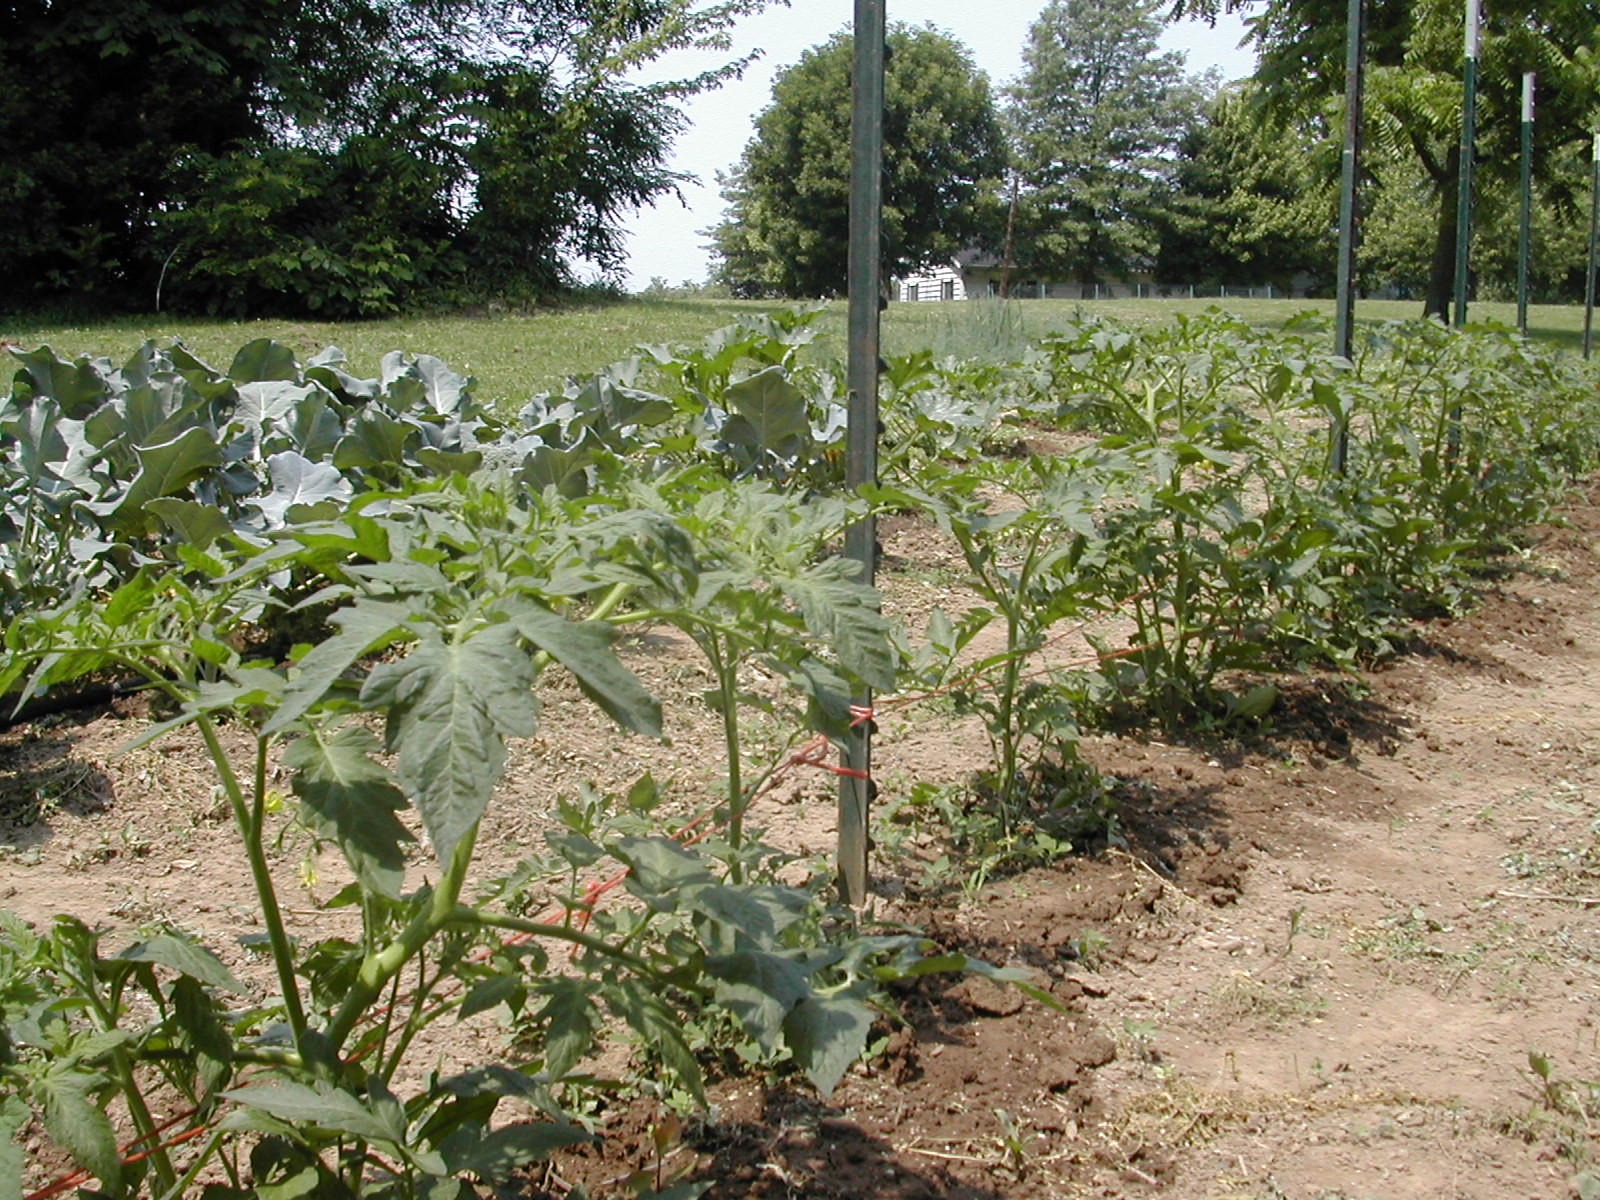
Harvesting was easy and the fruit was clean as it was held up off of the ground. The expense was minimal, if you already had the sticks, just some twine. At my friend’s farm, workers in the field made short work of tying the tomatoes using a piece of pvc pipe. The ball of twine would be hung from their belt and the end of the string would be passed through a 3′ section of pvc pipe. After tying the twine to the first post, they were able to hold the pipe and direct it around the plants, around the pole and around more plants all while standing and walking beside the row. It was much easier than stooping at every plant and post.
Unfortunately I won’t be using this method on my own tomatoes. I have one of the shadier spots of the garden and I’ve found that for me, tomatoes do much better on our balcony in pots than they do taking up space in my garden plot. While I love green tomatoes, I’m not willing to give up the space for them.