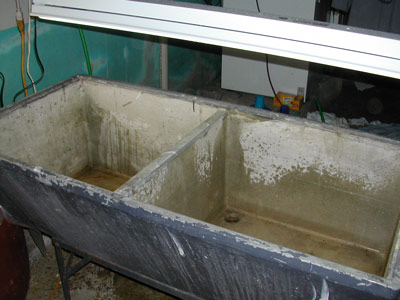
The old sink has been sitting in the basement holding junk since we moved in. I decided to liberate it for this project as it is just about the correct height, width and length for my needs. I can get 2-3 fluorescent light fixtures over it and the two sections will be great as heating chambers. The sink is not connected to any drain so I placed a bucket underneath to catch any potential drippage.
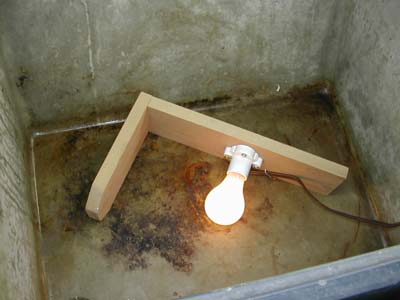
I fashioned the heating lamp out of a 40 watt bulb, a bulb outlet screwed to a board and a length of wire I liberated from a 99 cent 6′ extension cord. A cover will be placed over this bulb to keep water from dripping on the bulb. You can’t tell it from the picture but the bulb is not resting on the bottom of the sink. The cord is plugged into my dimmer box.
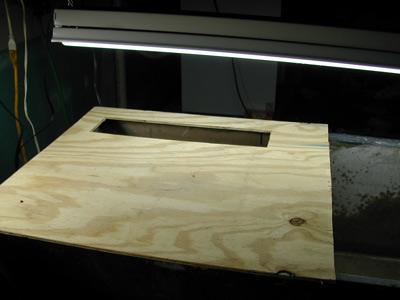
The first of a series of openings approx 20″ x 4″ is cut into the plywood top. The way the sink is designed the plywood does not fit tightly on all sides. This allows for some air circulation. The other side can be covered with a solid plywood top or one with similar cutouts depending on need.
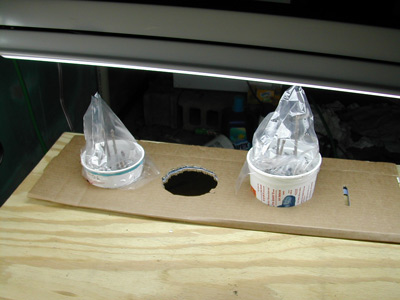
A cardboard template was created with 3 1/2″ openings to hold the soda cups I will use to start the cuttings. Different templates can be made to accomodate different sized containers. The final templates will be made out of plywood if I find that the double layer of cardboard doesn’t hold up.
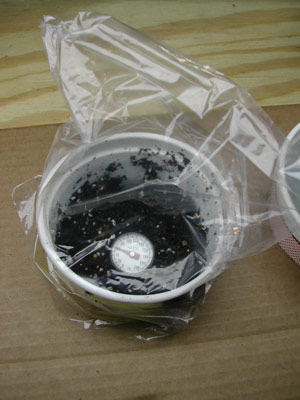
I set the light on low and placed a cup of wetted soil with a baggie over it in to get the temperature set. This could take a while as the sink itself is pretty cold to start with. At 10:30 pm on 3/10 it is 60F.
One thought on “Cutting Bench – Phase 2 – Setting It Up”